Posts

Showing posts with the label technique

New to Me Technique - Flying Geese

Image
ten 12.5 inch star blocks April 2023 The Stacked Stars quilt posted on Monday required ten star blocks, and the pattern introduced me to a “new” technique to make quick and accurate flying geese with minimal waste. I’m sure others are familiar with this method, but it’s the first time I’ve made such accurate and easy flying geese. I took photos of the process, and I’ll link the instructions at the end of this post.  It seemed odd to begin with two different sized squares. Once I marked the diagonal lines on the squares, I sewed on the stitch line and cut down the middle. The resulting HSTs were pressed with the seam toward the larger triangle.  The pressed HSTs were placed on top of each other and marked again on the diagonal and stitched, Note that the seams DO NOT nest on these HSTs. Once sewn, the pieces are cut apart.  I snipped to the stitch line so the units can be pressed.  The snipped seam allows the units to swivel, so the seams can be pressed AWAY from the...

Webbing a Quilt Top

Image
close-up of rows, webbed together Bonnie Hunter is a name that most quilters will recognize. She occasionally hosts live quilting sessions, and she demonstrated a technique called, Webbing, on one of her recent Quilt Cams. I tried the technique over Labor Day weekend, and I found it easy and much quicker than my usual method of sewing blocks and rows together. six rows of blocks "webbed" together Here's the video if anyone is interested in trying her technique.

Suminagashi Dyeing - part 2

Image
Sue O. adds dyes to the large tray of water June 2017 Yesterday, I shared my experience of Suminagashi Dyeing , and today, I will show you how the large panels of fabric were dyed. I did not dye a large square, but Sue did. once Sue had added all the ink that she wanted, the fabric was carefully placed on top of the ink-covered water making sure the fabric is straight and in the tray allowing the fabric to take up the ink  revealing the dyed panel The panel was rinsed in plain water after it was removed from the tray. It's a fun technique - I would like to try it again. Important Note: our instructor purchased cotton sheeting for the class and treated it with alum before the class so that it would take up the dye and so that the dye would adhere to the fabric. The fabric MUST be pre-treated. the ink, purchased on Amazon

Dailey Park Cowl #2

Image
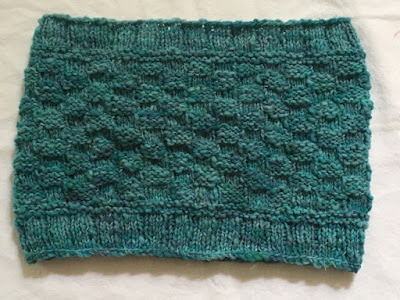
cowl knit with reclaimed wool and dyed with food coloring May 2017 I couldn't resist knitting something from the reclaimed wool that I dyed with food coloring. I had enough yarn in one skein for a Dailey Park Cowl . The yarn was the thick/thin variety and ranged from a sport-weight to a light-bulky weight. The pattern suggested a special technique called a Suspended Bind-off . The technique was new to me, and I was surprised that it provided a looser and slightly more stretchy edge than the traditional bind off. Have you tried the suspended bind-off?

Helical Stripes

Image
Helical Stripes - no jog March 2017 The concept of Helical Stripes ( Mason-Dixon Knitting ) is interesting and "new to me," so I used the technique to make a baby hat with some small yarn scrap balls.  It's easy and really does eliminate the jog to create an unbroken stripe. The photos in this post were taken at the beginning and end of the row - can you spot that point? from the small balls of scrap yarn I worked with a "light" and a "dark" to create stripes, using the Helical Stripe technique It's easier to spot the beginning and end of the row in this photo showing the cast-on edge. I like how the odd bits of yarn worked well together. I even tried it with two distinct yarns - orange variegated and black. two Helical Striped hats made with scrap yarn March 2017 Have you used the Helical Stripe technique?